Pay Trace Payment Plugin
Download the Plugin
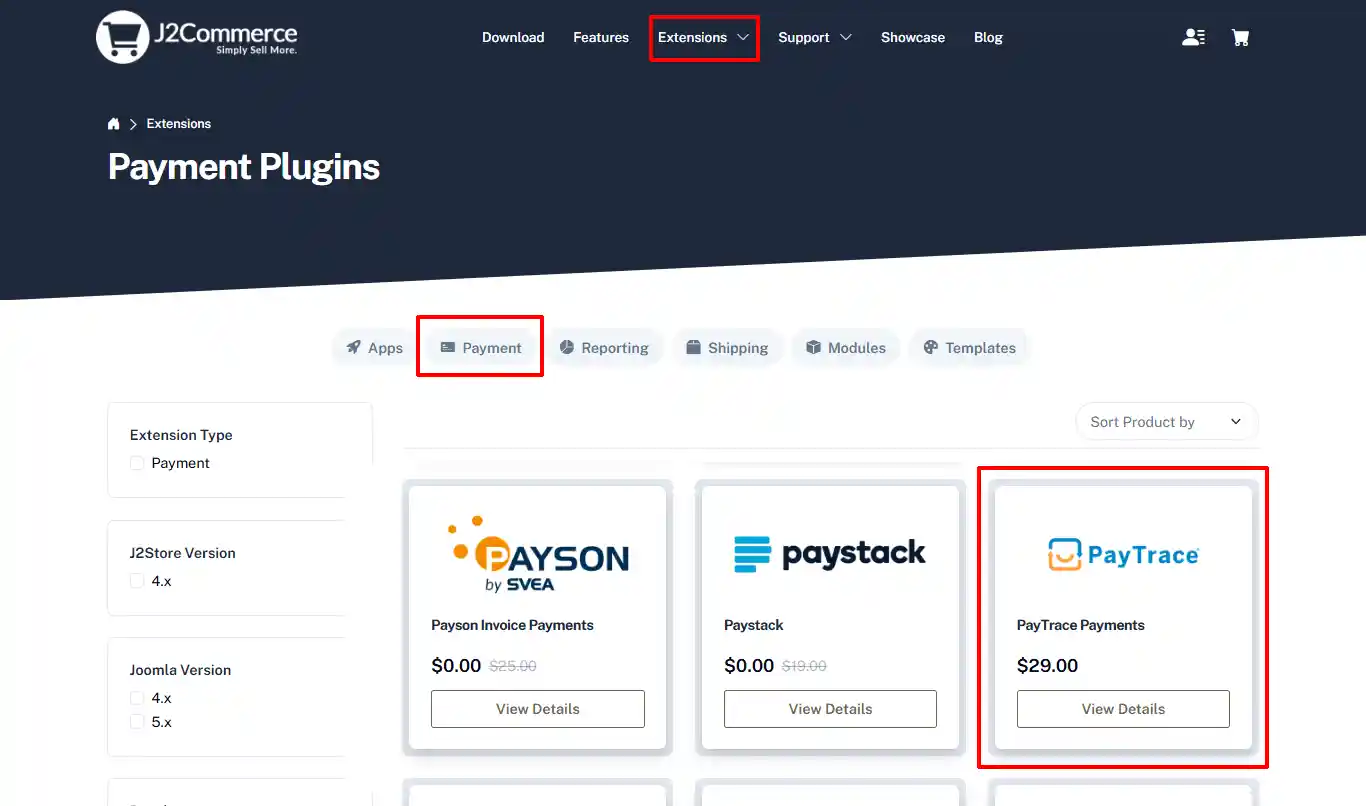
Step 1: Go to our J2Commerce website > Extensions > Apps
Step 2: Go to Extensions > Payment > Pay Trace Payments Plugin > click View Details > Add to cart > Checkout.
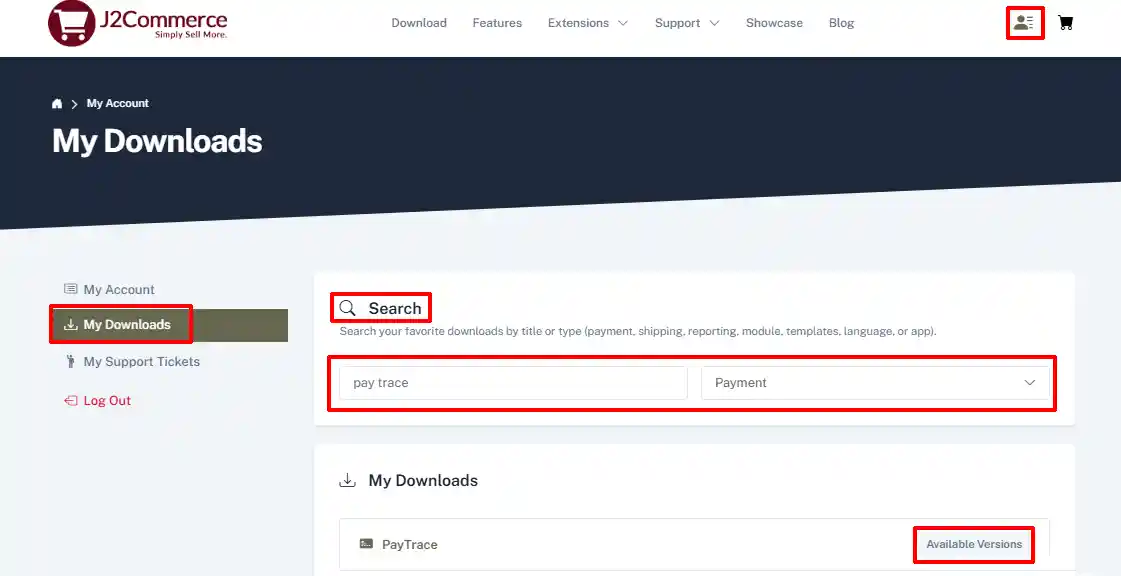
Step 3: Go to your My Downloads or My Account under your profile button at the top right corner and search for the Pay Trace plugin. Click Available Versions > View Files > Download Now
Install the Plugin
You can install the Pay Trace Payment plugin using the Joomla installer. The following steps help you with a successful installation.
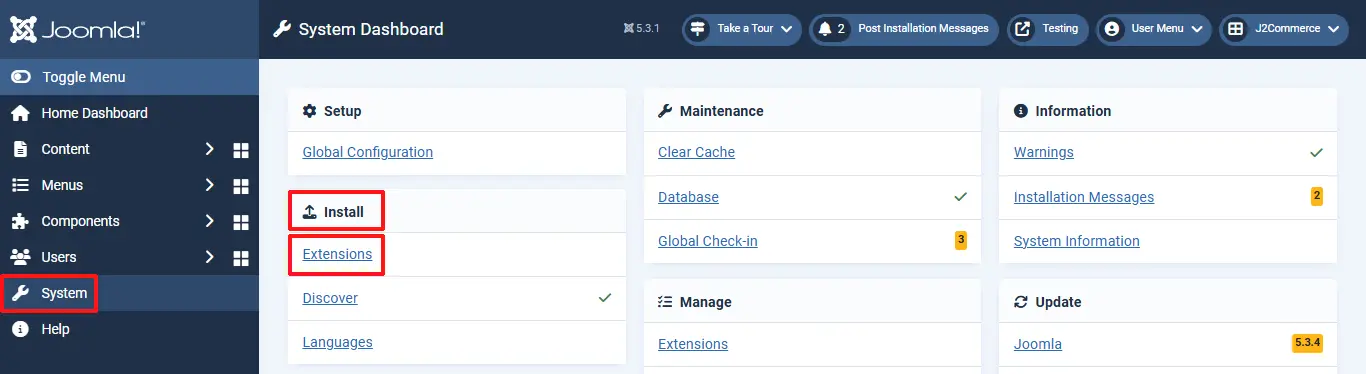
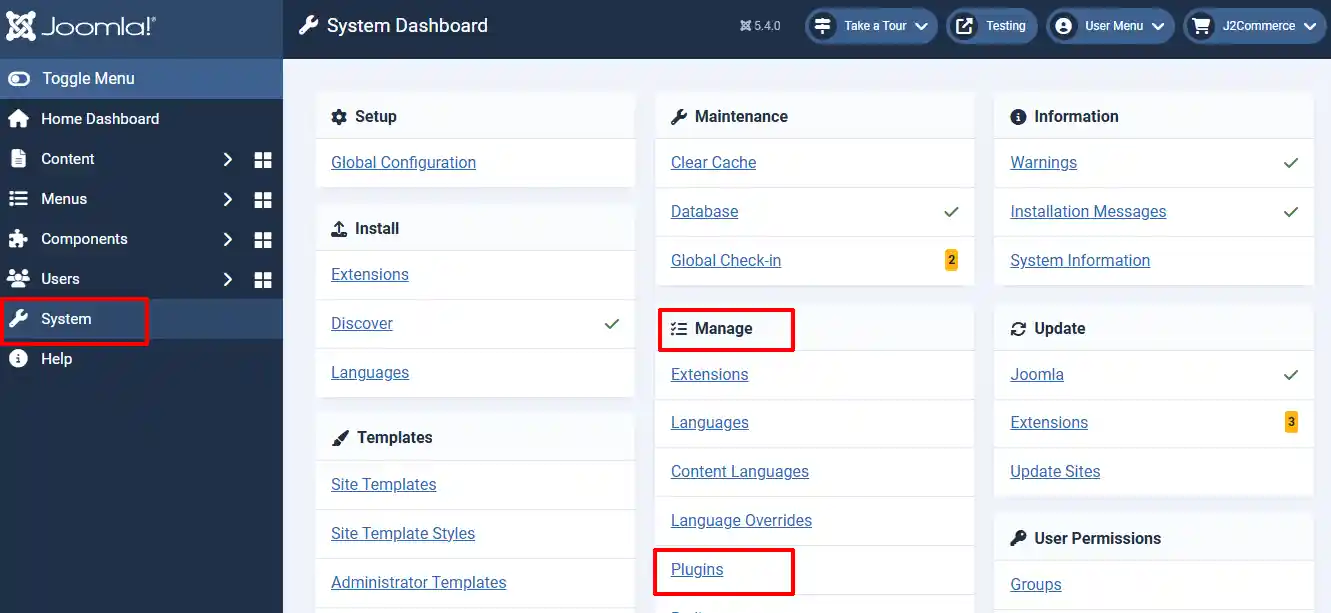
Step 1: In the Joomla admin, go to System > Install > Extensions
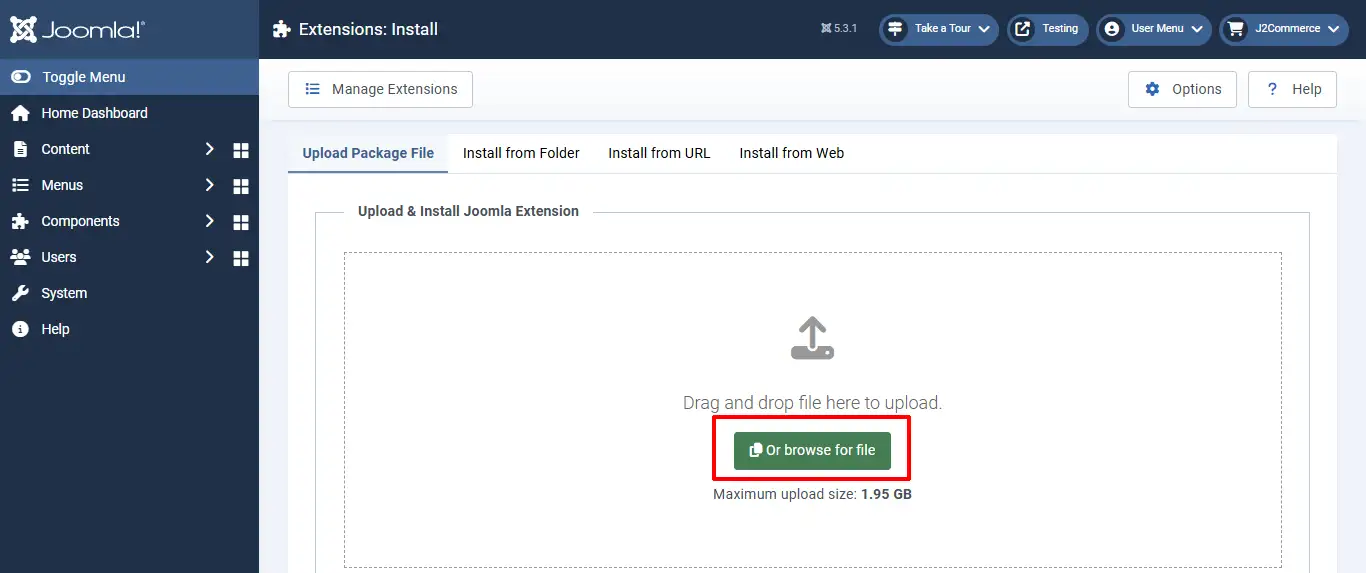
Step 2: Click on the Browse button and select the Pay Trace Payment zip file you saved during the download process. You will receive a message of success once installed.
Enable the Plugin
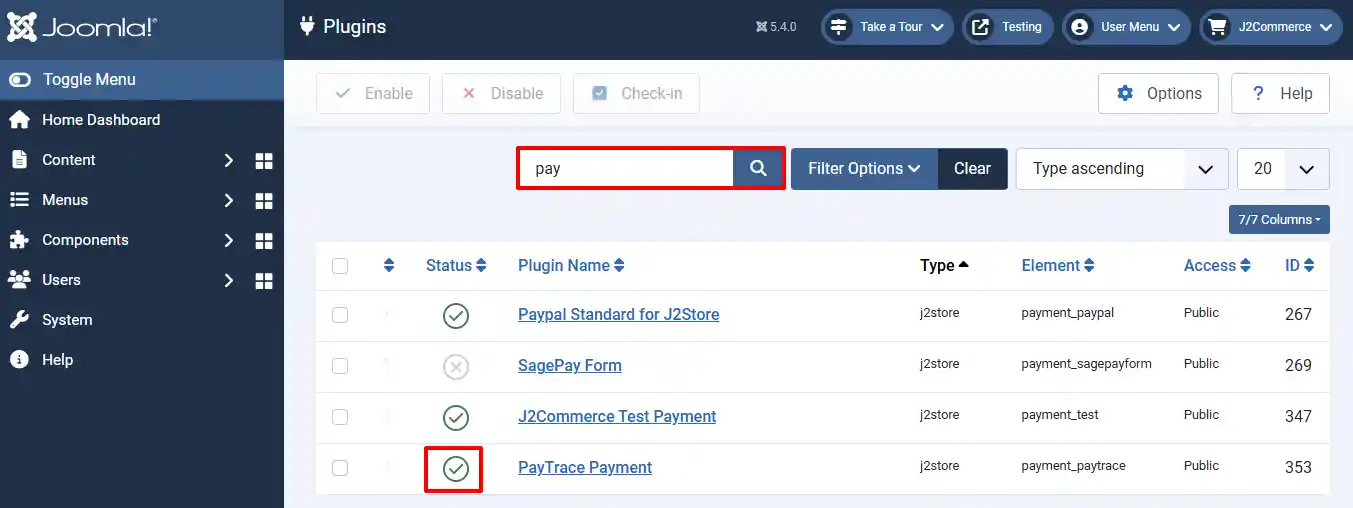
Step 1: Go to System > Manage > Plugins
Step 2: Search for the plugin and Enable it by clicking on the 'X'. It will turn into a checkmark.
Setting up the Parameters
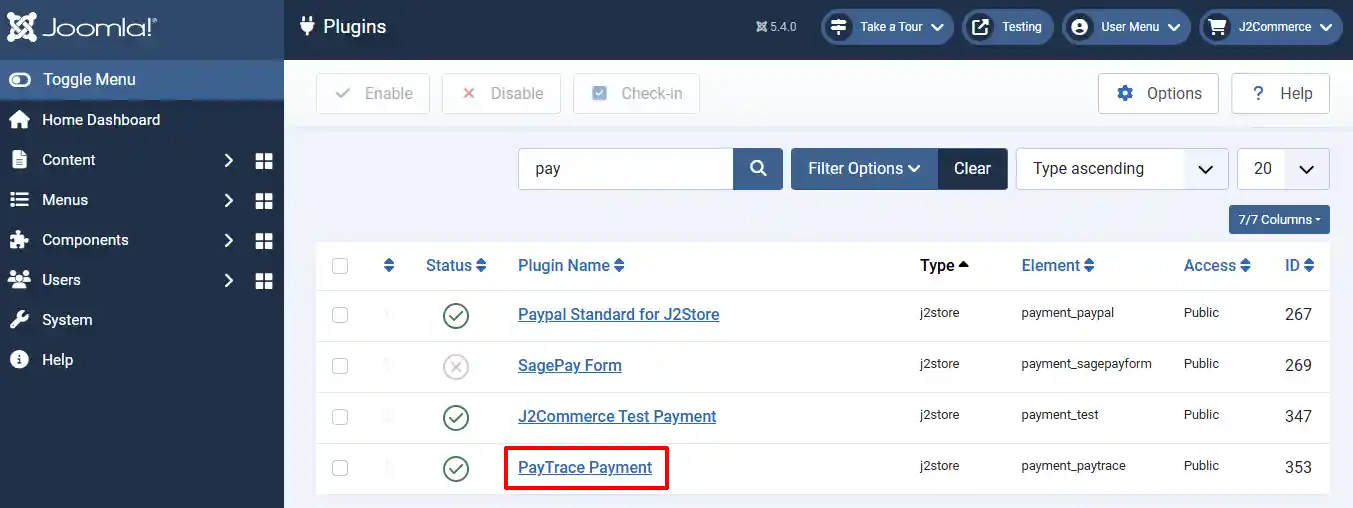
Once it has been enabled, open the plugin by clicking on the title.
Plugin Settings:

Payment Option Title: The title of the payment plugin, as displayed in the checkout page. If left blank, default value Paypal Payment will be used
Plugin Display Image: Image shown while payment options are listed in checkout page
PayTrace Mode: Set to Test mode or Live mode
Test Mode - Credit Cards
Use these PayTrace test card numbers in test mode to test your checkout before going live.
***Visa:*4012000098765439 - Exp: 02/28 - CV2: 999
***Mastercard:*5499740000000057 - Exp: 02/28 - CV2: 998
PayTrace Username: Enter your PayTrace username
PayTrace Password: Enter your PayTrace password
PayTrace Account ID: Enter your PayTrace Merchant ID / Account ID is usually found in the upper right corner when you log in to your PayTrace account.
Authorization Type: Select the authorization type:
-
Pre Authorization verifies a provided credit card information and places a hold on the amount requested.
-
Full Authorization performs the operation of Authorization and Capture in one request and charges the card immediately.
Accepted Card Type: Selected card types will display their icons next to the payment method at checkout. ie: Visa, Mastercard, Amex, Discover
Enable Card Flip: Select yes to enable the custom credit card input feature with card flip
Surcharge Percentage: You can specify a percentage here. Surcharge will be calculated based on the percentage of the total order and the cost will be added to the order
Article ID for thank you message: This article is displayed after payment is processed. It can include anything (including plugins) and should at the very least tell your customer what to do next
Geo Zone: If you want to restrict the availability of this shipping method to a particular geo zone, choose it. Otherwise, dont select anything
Display text on selection: The text entered here will be displayed when customer selects this payment method. You can enter a language constant as a value here if you are using a multi-lingual site and then write a language override. Refer the User guide for more information
Display text before payment: The text entered here will be displayed to the customer at the order summary screen before he makes the payment. You can enter a language constant as a value here if you are using a multi-lingual site and then write a language override. Refer the User guide for more information
Display text on after payment: The text entered here will be displayed after customer completes the payment. You can enter a language constant as a value here if you are using a multi-lingual site and then write a language override. Refer the User guide for more information
Display text on error in payment: The text entered here will be displayed when customer there is an error in payment. You can enter a language constant as a value here if you are using a multi-lingual site and then write a language override. Refer the User guide for more information
Payment button text: Name of the payment button. Default is: Place order. You can enter a language constant as a value here if you are using a multi-lingual site and then write a language override. Refer the User guide for more information
Debug: Show Debug Messages For Purolator