InterPay Canada
InterPay Canada is a card payment gateway for Canadian merchants. When a customer places an order, they enter their card details on your checkout page. J2Commerce securely forwards those details to InterPay to start a payment session, then redirects the customer to the InterPay secure verification page (which handles 3D Secure if required). When the verification is complete, InterPay sends the customer back to your store and J2Commerce confirms the result — the order status updates automatically.
Important: InterPay settles in Canadian Dollars (CAD) only. Your store must have CAD configured as a currency before this gateway will accept payments. If CAD is missing, the plugin shows a configuration error at checkout.
Prerequisites
- J2Commerce installed and active
- An active InterPay Canada merchant account with your TERMID and password
- CAD added as a currency in J2Commerce (see Step 1: Add CAD Currency)
- Your store running over HTTPS (SSL certificate installed)
- The InterPay payment plugin purchased from the J2Commerce Extensions Store
Setup Before Configuration
1: Add CAD Currency
Before configuring the plugin, confirm your store has CAD set up.
- Go to J2Commerce -> Localization -> Currencies.
- Check whether Canadian Dollar (CAD) already exists in the list. If it does, skip to Step 2.
- Click New, fill in the currency details for CAD, and click Save.
2: Gather Your InterPay Credentials
Log in to your InterPay Canada merchant account and note down your TERMID and Password (PASS). Keep this handy — you will paste these into the plugin configuration.
If you plan to test with the sandbox first, InterPay provides a separate Test TERMID and Test Password for sandbox transactions. The sandbox TERMID defaults to TESTTERM; InterPay support can confirm the correct test password for your account.
Purchase and download
This plugin is a separate add-on available from the J2Commerce Extensions Store. It is not included with the core J2Commerce 6 component.
- Go to the J2Commerce website and locate InterPay.
- Add it to your cart and complete checkout.
- Go to My Downloads under your account profile and find the plugin.
- Click Available Versions -> View Files -> Download Now to download the ZIP file.
Install the plugin
In the Joomla Administrator, go to System -> Install -> Extensions.
Upload the plg_j2commerce_payment_interpay.zip file.

Enable the Plugin
Once you have installed the App, you will need to enable it. There are two ways you can access the App.
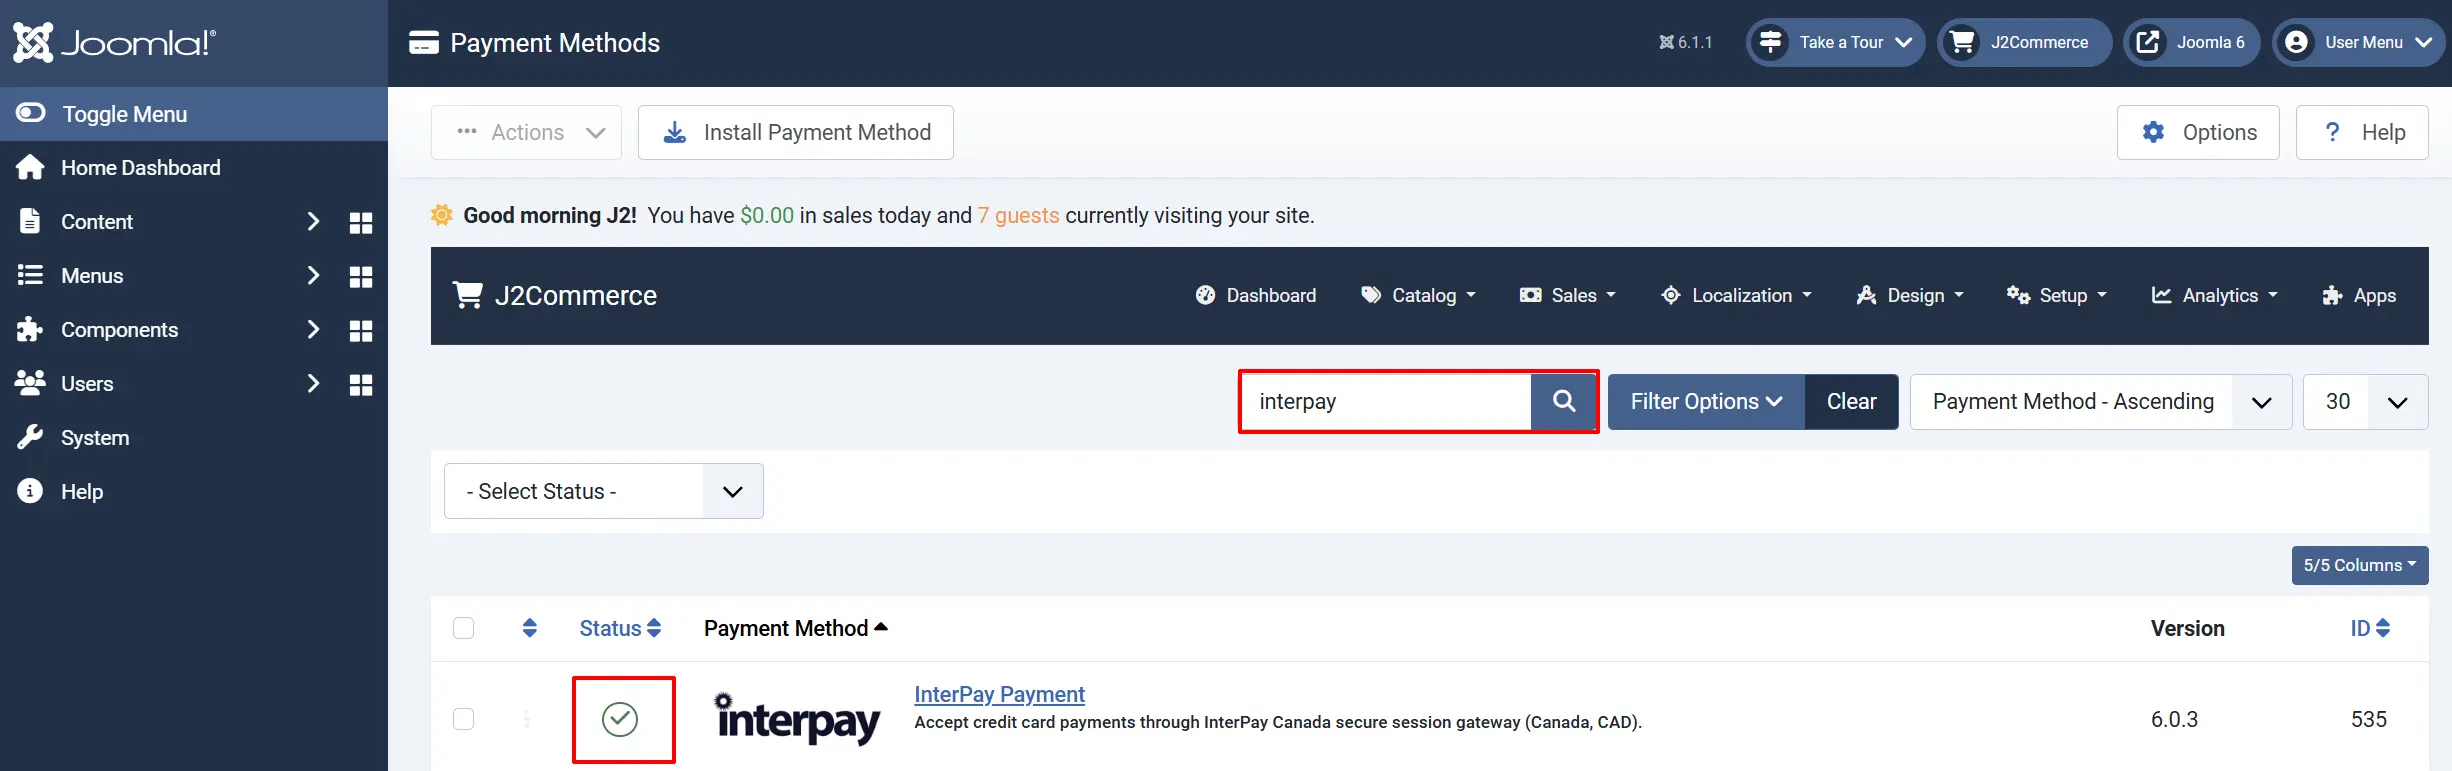
Option A: Go to the J2Commerce icon at the top right corner -> Setup -> Payment Methods
Option B: Go to Components on the left sidebar -> J2Commerce -> Dashboard -> Setup -> Payment Methods

To help you narrow down the list, you can do a search for InterPay, click the X, and it will turn into a green checkmark. It is now enabled and ready for setup.
Configure the Plugin
Click the Toggle Inline Help button at the top of any plugin configuration page to show a short description beneath each field.

Display Settings
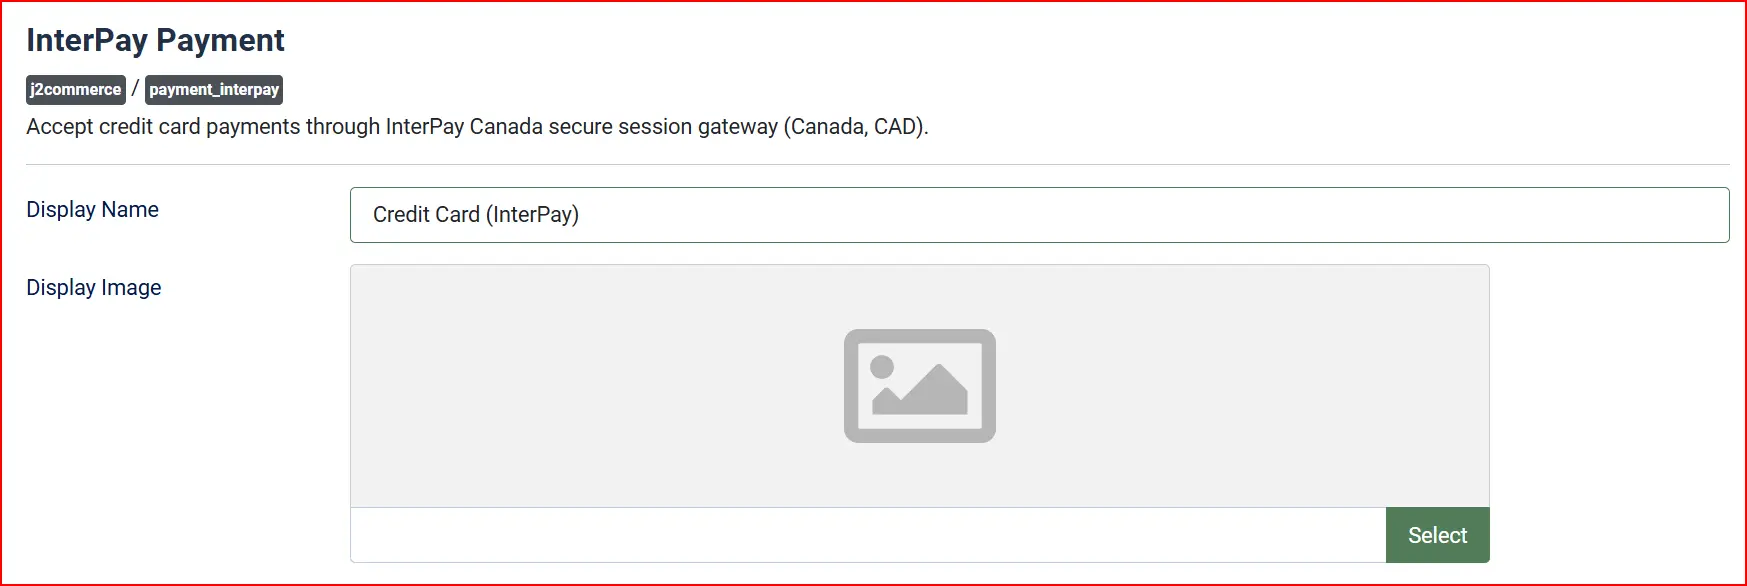
Display Name: Payment method label shown to customers at checkout
Display Image: Optional logo or image shown beside the payment method name
Credentials

Fill in the following fields in the Basic tab:
Test Mode: Set to Yes while testing; set to No for live transactions
Live TERMID: Your live InterPay Terminal ID
Live Password (PASS): Your live InterPay password
Test TERMID: Your InterPay sandbox Terminal ID (visible only when Test Mode is Yes)
Test Password (PASS): Your InterPay sandbox password (visible only when Test Mode is Yes)
When Test Mode is Yes, all transactions go to the InterPay sandbox server (gateway.InterPayCanada.com) using your test credentials. When it is No, transactions go to the live server using your live credentials.
Choose a Live Server

When Test Mode is off, you can select which InterPay live server endpoint to use.
Server B (Primary): svrb.InterPayCanada.com — use this unless InterPay support tells you otherwise
Server A: svra.InterPayCanada.com — alternate endpoint
Leave this on Server B unless your InterPay account manager has specifically directed you to Server A.
Transaction Type

The Transaction Type setting controls what happens to the funds when the card is verified.
-
Sale: Processes and captures the payment immediately. The customer's card is charged straight away. This is the correct setting for most stores.
-
Pre-Authorization: Holds (reserves) the funds on the customer's card without actually capturing the money. The order moves to your Pending Status and the funds remain on hold until you manually capture them in the InterPay portal. Use Pre-Authorization only if your workflow requires approving orders before charging the customer.
The default is Sale. If you select Pre-Authorization, remember that held funds will expire if you do not capture them within the timeframe your gateway agreement allows.
Order Status

These three fields control which J2Commerce order status is applied depending on the payment outcome.
Payment Received Status: InterPay reports the payment approved
Pending Status: Transaction type is Pre-Authorization (funds held, not captured), or the outcome is not yet final
Failed Status: InterPay declines or returns an error
The defaults work well for most stores. You only need to change these if your store uses custom order statuses.
NOTE: If the status you want isn't listed in the dropdown menu, you can create a new one by going to J2Commerce -> Setup -> Order Statuses

Save and Test
- Click Save in the toolbar.
- Place a test order with Test Mode set to Yes and complete the full checkout flow.
- Confirm the order status updates correctly in J2Commerce -> Orders after you return from the InterPay verification page.
- When you are satisfied the flow is working, return to the plugin configuration, set Test Mode to No, enter your live credentials, and click Save again.
Surcharge

Add an optional surcharge when customers pay by InterPay. A percentage and a fixed amount can be combined — they are added together.
Surcharge Name: Label shown on the order summary (e.g., "Card Processing Fee")
Surcharge Percent: Percentage of the order total to add as a fee
Surcharge Fixed: Fixed dollar amount to add as a fee
Surcharge Tax Class: Tax profile to apply to the surcharge amount
Restrictions

Geo Zone Restriction: Limit this payment method to customers in a specific geo zone. Leave blank to show it to all customers.
Customer Messages
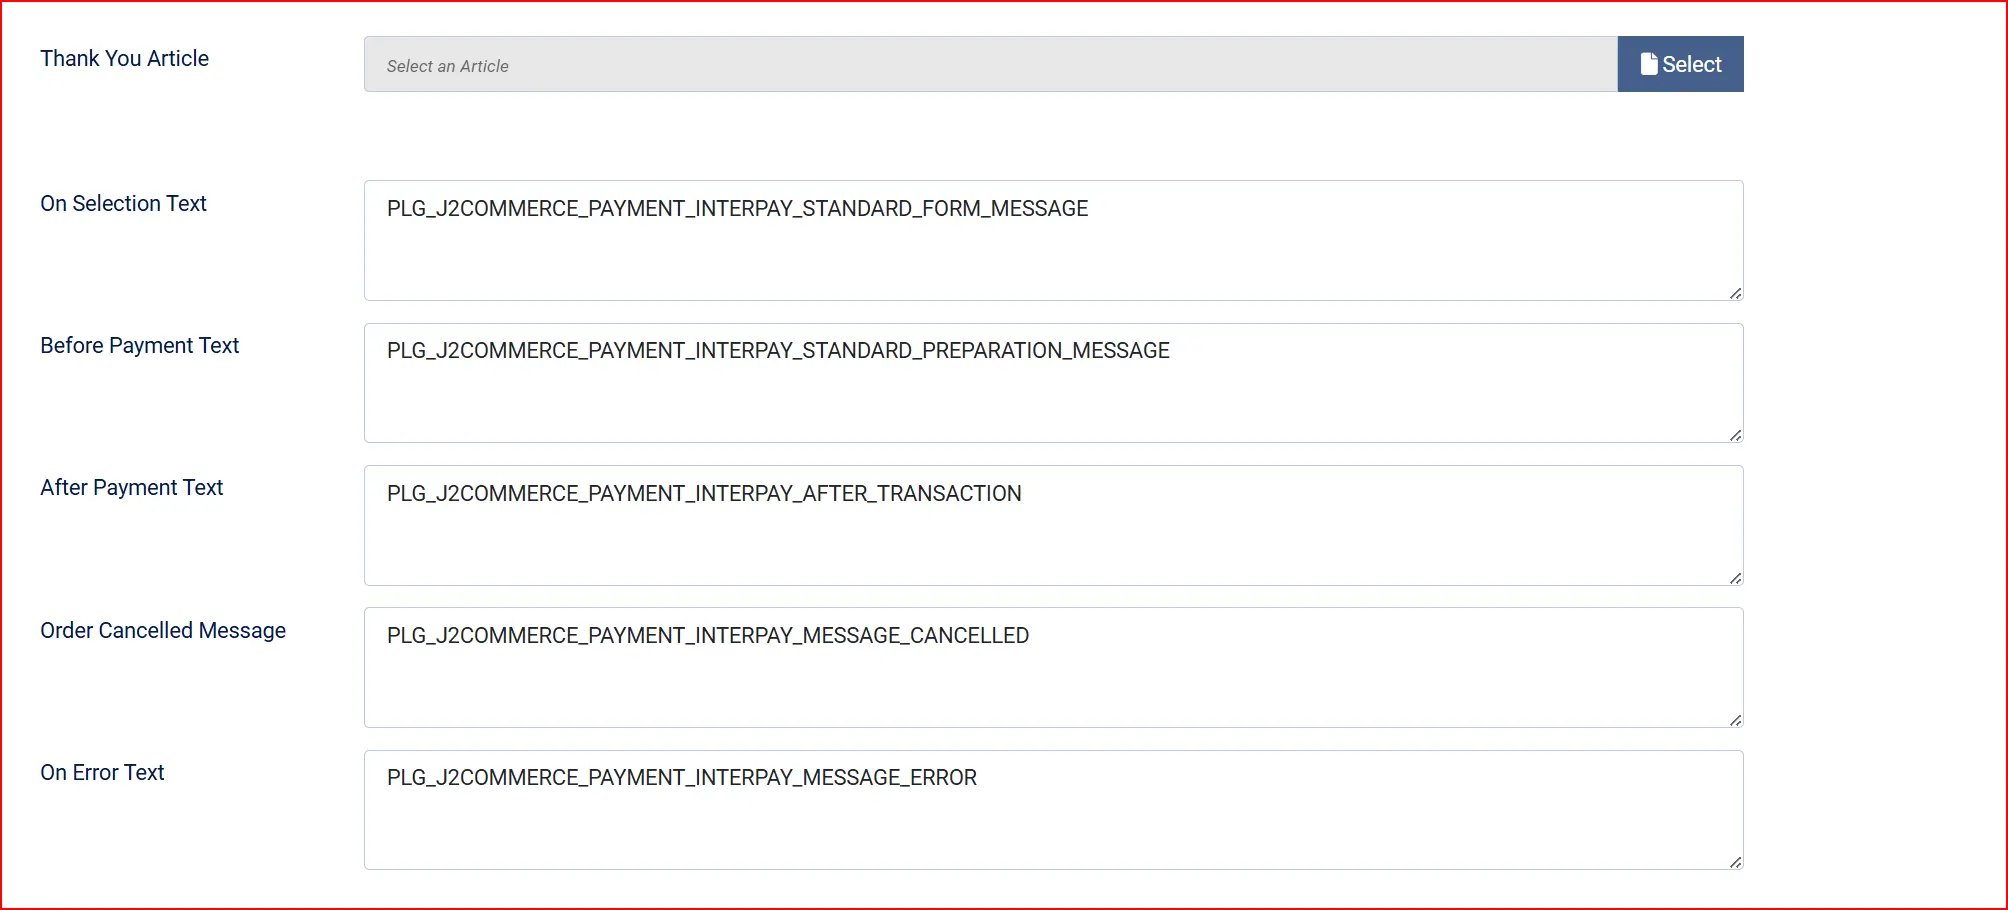
These text fields control what customers read at each stage of the payment process. You can leave them at their defaults or customise them to match your store's tone.
Thank You Article: A Joomla article to display on the post-payment confirmation screen
On Selection: When the customer picks InterPay as their payment method
"Please enter your card details below. You will be redirected to the InterPay secure verification page to complete your payment."
Before Payment: On the card entry form above the card fields
"Your card details have been received. Click the button below to complete your payment on the InterPay secure page."
After Payment: On the confirmation screen after a successful return
"Your payment is being processed. Your order status will be updated shortly. Thank you for your order!"
On Cancel: When the customer cancels on the InterPay page
"Your payment was cancelled. Please try again or choose a different payment method."
On Error: When the gateway returns an error
"There was an error processing your payment. Please try again or contact us for assistance."
Appearance
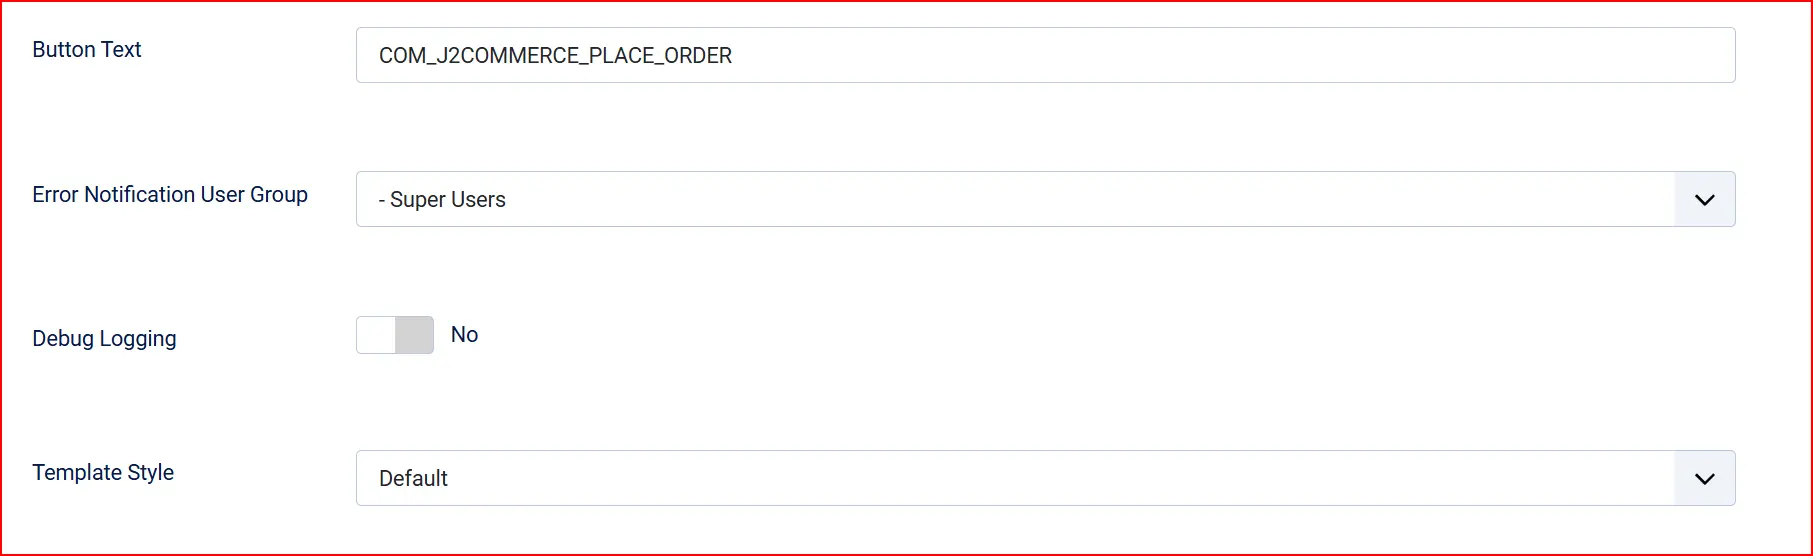
Button Text: Label on the button that redirects the customer to the InterPay secure page
Error Notification User Group: Members of this Joomla user group (with email notifications enabled) receive an alert when a payment fails validation
Debug Logging: Write gateway responses to the Joomla log
Template Style: Frontend template style — Bootstrap 5 or UIkit
How a Customer Pays
Here is what your customers experience from the moment they reach the payment step:
- The customer reaches the payment step of checkout and selects InterPay as their payment method.
- J2Commerce displays the card entry form. The customer fills in their cardholder name, card number, expiry month and year, and CVV.
- The customer clicks Place Order (or whatever you have set as the Button Text).
- J2Commerce securely forwards the card details to InterPay to create a payment session. The customer is shown a confirmation screen displaying the last four digits of their card and the expiry.
- The customer clicks the button to proceed and is redirected to the InterPay secure verification page hosted by InterPay Canada. If required, InterPay performs a 3D Secure step here.
- Once verification is complete, InterPay redirects the customer back to your store.
- J2Commerce calls the InterPay API directly to confirm the authoritative result — the order status is set to Confirmed, Pending (if Pre-Authorization), or Failed based on the verified outcome.
- The customer sees your confirmation page with the After Payment message.
You do not need to configure any return URLs in your InterPay merchant account — the plugin sets them automatically for every transaction.
Order Statuses
Payment approved (Sale): Confirmed (or your configured Payment Received Status)
Pre-Authorization approved (funds held): Pending (or your configured Pending Status)
Payment declined or gateway error: Failed (or your configured Failed Status)
When Transaction Type is set to Pre-Authorization, your order will stay in the Pending status until you manually log in to your InterPay merchant portal and capture the held funds. Once you capture them there, you can manually move the order to Confirmed in J2Commerce using the order status controls.
Security
Card data is entered on your Joomla site. The InterPay gateway uses a session-based flow where card details are submitted on your checkout page, then forwarded securely from your server to InterPay to start the session. The customer is then redirected to InterPay for 3D Secure verification.
This means your store is in the card data path. Here is what this means for you as a store owner:
- Always run your store over HTTPS. An SSL/TLS certificate is essential — card details in transit must be encrypted. Most hosting providers offer free certificates via Let's Encrypt. Without HTTPS, card data is exposed.
- PCI compliance. Because card details pass through your server before reaching InterPay, your store is subject to PCI DSS SAQ-A-EP or SAQ-D scope. This is the gateway's documented integration method. If you are unsure about PCI obligations, consult a Qualified Security Assessor or speak with your InterPay account manager.
- Card data is never stored or logged. The plugin never writes card numbers, CVV codes, or expiry dates to any log file or database field. Only safe result fields (transaction ID, response code, status) are recorded.
- Gateway returns are not signed. When InterPay redirects the customer back, the return URL parameters are not cryptographically signed. J2Commerce handles this by always calling the InterPay API server-to-server to get the authoritative result — it does not rely on the return URL parameters alone.
Subscription Support
InterPay is a session-based redirect gateway and does not support stored payment tokens. Subscription products with automatic recurring billing are not supported with this gateway. If your store sells subscription products, use a gateway that supports card vaulting, such as Stripe or Braintree.
What's New in J2Commerce 6
If you previously used InterPay with J2Store, the J2Commerce 6 version brings several improvements:
- Reliable return handling. The old J2Store version relied on a standalone
success.phpfile that manually bootstrapped Joomla — fragile and path-dependent. The J2Commerce 6 version routes the return through the proper Joomla checkout controller with no standalone files. - Secure gateway connections. The old version had TLS peer verification disabled in the code. The J2Commerce 6 version enforces TLS certificate verification and peer validation on all server-to-server calls, plus connection and response timeouts to prevent hung requests.
- Card data is never logged. Gateway responses are filtered against a strict allowlist of safe fields before anything is written to the log. Card numbers, CVV codes, and expiry dates cannot appear in log output.
- Surcharge support. Add a percentage or fixed fee when customers pay by InterPay.
- Geo zone restriction. Limit InterPay to customers in specific regions.
- Configurable order status mapping. Choose exactly which order status is applied for confirmed, pending, and failed payments.
- Live server A/B selection. Choose between InterPay's primary and alternate live endpoints — the old XML form was missing this field even though the code used it.
- Bootstrap 5 and UIkit 3 templates. The card entry form and redirect page render correctly with both the Bootstrap 5 and UIkit app templates.
- Native Joomla 6 architecture. Built on Joomla 6 MVC with namespaced PHP classes and no legacy FOF dependency.
Troubleshooting
"InterPay settles in Canadian Dollars (CAD). Please add the CAD currency..."
Cause: The CAD currency has not been added to J2Commerce, or it exists but is disabled.
Solution:
- Go to J2Commerce -> Localization -> Currencies.
- If CAD is in the list but disabled, click it and set its status to Enabled, then click Save.
- If CAD is not in the list at all, click New, enter the currency details for Canadian Dollar (CAD), and click Save.
The order status stays at the default after the customer returns from InterPay
Cause: The server-to-server GetResult call from J2Commerce to InterPay may have failed, or the customer returned before the result was confirmed.
Solution:
- Enable Debug Logging in the plugin configuration.
- Place a test order and check System -> Logs for entries categorised as
plg_j2commerce_payment_interpay. - Look for a GetResult response — any error message there will explain the problem.
- Confirm your server can make outbound HTTPS connections to
svrb.InterPayCanada.comon port1443. Some hosting environments block outbound connections on non-standard ports; check with your hosting provider. - You can manually update the order status from J2Commerce -> Orders while you investigate.
Payment is declined but the customer's bank shows a hold on funds
Cause: This can happen with Pre-Authorization transactions. The funds were successfully held (pre-authorized) at the bank level, but the GetResult call returned a non-success code, so J2Commerce marked the order as Failed. The hold will release automatically according to your bank's hold policy (typically 3–7 days).
Solution: If you want to capture the held funds, log in to your InterPay merchant portal and capture the transaction from there. Then manually update the order status in J2Commerce. To avoid this situation, switch Transaction Type to Sale if you do not need to approve orders before charging.
Customers are not redirected to the InterPay verification page
Cause: The StartSession call to InterPay failed. This is usually a credentials issue or a network problem.
Solution:
- Enable Debug Logging and repeat the checkout.
- Check System -> Logs for the StartSession response. The log entry will include any error code returned by InterPay.
- Confirm your TERMID and Password are correct — copy them fresh from your InterPay merchant account.
- If Test Mode is on, confirm your Test TERMID and Test Password are for the InterPay sandbox environment.
The payment method is not showing up at checkout
Cause: Either the plugin is disabled, or a Geo Zone Restriction is set and the customer's billing address is outside that zone.
Solution:
- Go to System -> Manage -> Extensions, search for InterPay, and confirm the plugin status is Enabled.
- Open the plugin configuration and check the Geo Zone Restriction field. If a zone is selected, verify that the customer's billing country and state fall within that zone under J2Commerce -> Localization -> Geo Zones.
- If the restriction is the cause but you want the method to be available everywhere, clear the Geo Zone Restriction field and click Save.
Admin notification emails are not arriving
Cause: The selected Error Notification User Group has no members, or the members have system emails turned off.
Solution:
- Go to System -> Manage -> Users and find an administrator in the selected group.
- Open their user profile and confirm Receive System Emails is set to Yes.
- Return to the InterPay plugin configuration and confirm the correct group is selected in Error Notification User Group.